
What Causes Warpage in Injection Molding and How to Fix It
Jul 21,2026
Warpage—also referred to as warping, deformation, or dimensional distortion—is one of the most common and frustrating defects in injection molding production. It occurs when a molded part bends, twists, bows, or deviates from its intended shape after cooling and ejection. Unlike simple shrinkage (where a part only becomes uniformly smaller), warpage means the part's shape has changed—edges curl, flat surfaces bow, and dimensions fall outside tolerance.
Warpage is particularly difficult to diagnose because it is rarely caused by a single factor. Multiple causes often overlap—amplifying or offsetting each other—making manual analysis extremely challenging. However, when you understand the root mechanism and systematically address each contributing factor, warpage can be significantly reduced or even prevented entirely.
In this guide, we break down the fundamental mechanism of warpage, walk through causes across material selection, product design, mold design, and process parameters, and provide actionable solutions and a troubleshooting checklist drawn from real production-floor experience.
What Does Warpage Look Like?
Warpage appears as visible shape distortion in an otherwise correctly molded part. The part may:
- Bend or bow — flat surfaces curve upward or downward
- Twist — the part rotates or warps along its axis
- Curl at edges — rim or flange areas lift away from the intended plane
- Show dimensional deviation — critical dimensions fall outside specification
It is most commonly found on:
- Large flat or thin-wall parts (panels, covers, lids)
- Box or frame structures (crates, housings)
- Parts with significant wall thickness variation
- Fiber-reinforced plastic components (where anisotropic shrinkage is extreme)

Why Do Injection Molded Parts Warp? The Root Cause
The fundamental mechanism behind warpage is straightforward:
If every area of a part shrinks uniformly, the part only becomes smaller—its shape stays the same. But when one area shrinks more than another, internal stress develops. When that stress exceeds the part's structural strength, the part warps after ejection.
This non-uniform shrinkage comes from four interacting mechanisms:
1. Molecular Orientation Stress
During filling, polymer chains are stretched and aligned along the melt flow direction by shear forces. After filling stops, these oriented chains try to recoil back to their original random state, causing greater shrinkage along the flow direction than perpendicular to it. This directional shrinkage difference (anisotropy) is a primary driver of warpage.
2. Crystallinity Differences
For semi-crystalline materials like PP, PE, POM, and PA, uneven mold temperature causes different regions to cool at different rates, producing different crystallinity levels. Higher crystallinity means denser molecular packing and greater shrinkage. When the temperature difference across the mold exceeds 10°C, warpage risk increases significantly.
3. Uneven Cooling
When a part's inner and outer layers, or areas near the gate versus far from the gate, cool at different rates, shrinkage timing and magnitude differ across the part. This creates internal tensile and compressive stresses that, upon ejection, cause warpage.
4. Volumetric Temperature Stress
If a part is ejected while its interior is still at high temperature, it continues to shrink after leaving the mold. Because the part's geometric complexity constrains this free shrinkage unevenly, warpage results—especially in high-shrinkage materials like PP.

How Material Type Affects Warpage
Understanding how different plastic categories shrink is essential for predicting and preventing warpage. Each material type has a fundamentally different shrinkage pattern:
Amorphous (Non-Crystalline) Materials — ABS, PS, PC
At room temperature, molecular chains are tangled and disordered. During injection, shear forces align chains along the flow direction. After flow stops, chains relax toward their random state, pulling the material together.
- Overall shrinkage: relatively low
- Directional pattern: flow direction shrinks more than perpendicular direction
- Key takeaway: Amorphous materials shrink less overall, but the flow direction shrinks more than the perpendicular direction.
Semi-Crystalline Materials — PP, PE, POM, PA
These materials contain both crystalline regions (molecules neatly folded and tightly packed) and amorphous regions. When melted, crystalline regions break apart, causing significant volume expansion. During cooling, molecules do not simply relax—they maintain their flow-direction orientation and begin re-crystallizing, producing dramatically higher overall shrinkage. Importantly, the perpendicular direction shrinks more than the flow direction—opposite to amorphous materials.
- Overall shrinkage: high
- Directional pattern: perpendicular direction shrinks more than flow direction
- Key takeaway: Semi-crystalline materials shrink significantly more overall, and the shrinkage pattern is reversed—greater perpendicular to flow.
Glass Fiber Reinforced Materials
Glass fibers act like "rebar" inside the plastic, constraining shrinkage along their alignment direction. However, this creates extreme anisotropy:
- Along the flow/fiber direction: very low shrinkage (fibers hold the material in place)
- Perpendicular to the flow/fiber direction: relatively high shrinkage (no fiber constraint)
- Key takeaway: Glass fiber reinforced materials produce the most severe warpage due to extreme directional shrinkage difference—the highest anisotropy of all material types.
Material Selection Issues
Thin-wall parts filled with low-flowability resin, or thick-wall parts filled with overly fluid resin—both lead to uneven filling and packing, where material solidifies before being adequately compressed.
Solution: Work with material suppliers to select a grade with appropriate flow characteristics and low warpage tendency for the specific part geometry
Product Design Factors
Wall Thickness Variation
When wall thickness varies significantly across a part, volumetric shrinkage rates differ between thick and thin sections. The resulting residual stress, if it exceeds the part's structural strength, causes warpage.
Solution: Collaborate with product and mold engineers to optimize part structure for uniform wall thickness and balanced material flow.
Structural Asymmetry
Asymmetric shapes, uneven rib distribution, and abrupt wall thickness transitions create complex filling patterns with large shrinkage differences across the part.
Solution: Aim for balanced geometry; distribute reinforcing ribs evenly; avoid sudden thickness changes.

Mold Design Factors
1. Mold Temperature Unevenness
Temperature differences across the mold surface cause different cooling rates and shrinkage levels. For crystalline materials with high molding shrinkage, this effect is amplified.
- Critical threshold: When temperature difference between any two points on the mold exceeds ~5.5°C (10°F), warpage risk rises sharply. Use a mold thermometer to check multiple points across the cavity surface.
- Solution: Optimize cooling channel layout, eliminate hot spots, and ensure uniform mold temperature distribution.
Core vs. Cavity Temperature Difference
If the core (male mold side) temperature is higher than the cavity (female mold side), the part will bend toward the core after ejection. For box-shaped parts, this means the rim curls inward. This effect is especially pronounced when melt temperature is also low (because flow-direction shrinkage is then dominant).
Core areas tend to overheat because they are enclosed—adequate cooling is essential
If core temperature cannot be reduced, raising the cavity-side temperature is an auxiliary strategy to narrow the temperature gap
2. Gate Size Too Small
A gate that is too small creates excessive pressure loss during filling. The polymer chains are stretched under high shear, generating strong orientation stress that leads to warpage.
- Solution: Optimize gate size and shape. Increasing gate dimensions often reduces warpage noticeably.
3. Gate Number and Position
Too few or poorly positioned gates → long flow paths
When the flow path from gate to the farthest fill point is too long:
- Injection pressure must increase, stretching and compressing molecular chains → high mechanical stress
- Pressure near the gate is high (low volumetric shrinkage), but pressure at the last-fill area is low (high volumetric shrinkage) → large shrinkage difference across the part
- Solution: Follow material supplier recommendations for flow-length-to-thickness ratio. Add gates to reduce flow length when needed.
Gate position guidelines by part shape
- Do not direct melt flow against an unsupported core—ensure core sides receive balanced flow forces
- Large flat rectangular parts (with high-orientation resins): use film gates or multi-point side gates; avoid direct gates or point gates arranged in a straight line
- Disc-shaped parts: use multi-point pin gates or direct center gates; avoid side gates
- Ring-shaped parts: use disc gates or spoke/cross gates; avoid side gates or pin gates
- Shell-shaped parts: use direct gates; avoid side gates
General filling principle
- Fill thick sections before thin sections; fill flat areas before curved areas
- Ensure melt encounters immediate resistance after entering the cavity (to prevent jetting and reduce residual stress)
- Gate position should ensure balanced filling—all melt fronts should reach cavity endpoints and form weld lines at approximately the same time
4. Runner, Sprue, and Gate System Design
- Runners or gates that are too small or too long increase flow resistance, requiring higher injection pressure → molecular chains are stretched and compressed → high residual stress → warpage or even cracking
- Poor runner/gate positioning can place weld lines in structurally sensitive areas where stress is already high—cracks often originate from weld lines
- Solution: Design runners with adequate cross-section; position weld lines away from high-stress zones
5. Uneven Ejection
When the ejection system is unbalanced:
- Ejection force applies unevenly while the part is still warm, adding extra stress on top of existing cooling stresses
- After full cooling, the combined stresses cause warpage
- Solution: Regularly inspect and adjust ejector mechanisms. Ensure uniform ejection force, adequate lubrication, and no slipping. For large molds, the ejector plate must use guide bushings to prevent the mold core from sagging under its own weight.
6. Insufficient Draft and Poor Venting
- Insufficient draft angle makes part removal difficult, increasing ejection force
- Too few ejector pins, or pins concentrated unevenly, create unbalanced push
- Fast or inconsistent ejection speed adds stress
- Inadequate venting can also contribute indirectly to warpage
- Solution: Set appropriate draft angles; distribute ejector pins evenly; moderate ejection speed or increase ejection stroke
7. Anti-Warpage Mold Design (Reverse Curvature)
For medium and small molds producing high-volume parts, it is possible to design the cavity with a slight reverse curvature—opposite to the expected warpage direction—to compensate for orientation shrinkage. This requires repeated mold trials and modifications and is difficult to master, but can be effective for large-batch production.

Process Parameter Factors
1. Holding Pressure Too Low
After injection completes, the material in the cavity has an outward rebound force. If holding pressure is too low while the gate has not yet frozen, material near the gate flows backward (back-flow):
- Gate area: low density, high volumetric shrinkage
- Other areas: relatively lower volumetric shrinkage
- This shrinkage difference generates large residual tensile and compressive stresses → warpage upon ejection
- Solution: Increase holding pressure to prevent back-flow.
2. Holding Time Too Short
Insufficient holding time means:
- Internal voids and surface sink marks increase
- Density distribution becomes more uneven
- Asymmetric shrinkage worsens → warpage intensifies
- Solution: Extend holding time until the gate freezes completely.
3. Holding Pressure Too High
Paradoxically, excessive holding pressure also causes warpage:
- Near-gate area: over-compressed, low shrinkage
- Other areas: higher shrinkage
- The resulting shrinkage imbalance still produces warpage
- Solution: Reduce holding pressure to an appropriate level—not too low, not too high.
4. Insufficient Barrel Residence Time
When material stays in the barrel too briefly:
- Melt is not uniformly heated or fully melted
- Local unmelted, harder portions cool before being adequately packed
- Uneven shrinkage results
- Solution: Extend cycle cooling time to ensure material is fully melted and uniformly heated.
5. Barrel and Hot Runner Temperature Too Low
Low melt temperature causes:
- Reduced material flowability
- Filling may not complete before freezing
- High injection pressure forces molecular chains to stretch along flow direction → strong orientation
- After cooling, chains recoil → massive residual stress → warpage, twisting, bowing
- Solution: Raise barrel temperature to ensure uniform melt quality in the melt pool.
6. Mold Temperature Too Low
Low mold temperature causes the surface layer to freeze almost instantly upon contact with the cavity, while the core remains hot and molten:
- The frozen skin locks in shape
- The still-molten core continues to shrink inward
- This generates locked-in tensile (skin) and compressive (core) residual stresses
- Upon ejection, the mold constraint vanishes, and residual stress begins releasing → warpage
- Stress release continues: immediate upon ejection (most visible deformation), then gradually over hours to days (some materials like PC and ABS continue micro-deforming for days)
- Solution: Set mold temperature within the material supplier's recommended range. When adjusting mold temperature, change by ~10°C increments and wait at least 10 molds before evaluating results.
For PP thin-wall parts specifically, mold temperature should be controlled at 60–80°C to avoid rapid surface freezing while the core remains molten, which would lock in high internal stress.
7. Core vs. Cavity Temperature Difference
When the two mold halves have different temperatures, the part cools at different rates on each side:
- The hotter side shrinks more
- This creates a bending moment
- Result: the part warps toward the hotter side
- Solution: Reduce the temperature difference between core and cavity through cooling design optimization.
8. Nozzle Temperature Too Low
A cold nozzle slows melt flow, reduces packing effectiveness, and contributes to warpage.
- Solution: Confirm nozzle design suits the material. Raise nozzle temperature in ~5.5°C (10°F) increments until warpage improves.
9. Unstable Molding Cycle
Manual intervention—operators opening the mold early or ejecting parts prematurely—causes inconsistent cooling:
- Insufficient cooling → uncontrolled shrinkage → warpage
- Solution: Switch to fully automatic production to reduce human variability. Train all operators to maintain consistent cycle timing.
10. Injection Pressure and Speed Too Low
Low injection pressure and slow injection speed fail to adequately pack the material, leaving uneven density and shrinkage across the part—contributing to warpage.
- Solution: Increase injection pressure and/or speed within process limits.
Post-Molding Remedies
When warpage cannot be fully resolved through design and process adjustments alone, two post-molding approaches can help:
Heat Treatment (Annealing)
Combining lower melt and mold temperatures with immediate post-demolding heat treatment is particularly effective. Lower temperatures reduce molecular orientation differences, but they also freeze in residual stress quickly. Annealing releases that locked-in stress.
- Method: Immediately after demolding, immerse the part in warm water at 37.5–43°C and allow it to cool gradually. This significantly reduces orientation stress within the part.
- Caution: If you reduce melt and mold temperature without annealing, the improvement may be temporary—residual stress remains locked in and can re-appear when the part encounters higher temperatures during use or storage.
Fixture Shaping (Jig Fixing)
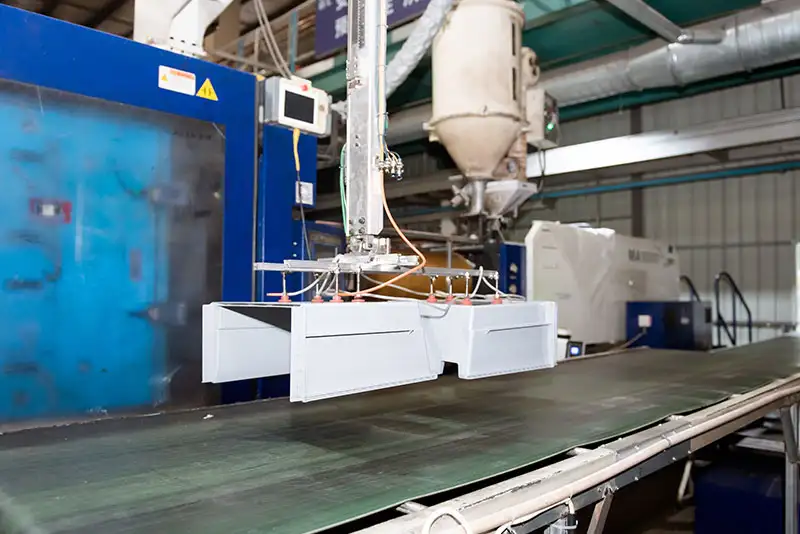
Place the warped part in a wooden fixture matching its intended external shape. Allow the part to freely contract within the fixture—do not apply external pressure. Light cooling assistance can speed up shape stabilization.
For box-type parts (e.g., turnover crates), use support boards or frames to prevent further shrinkage or expansion.
How to Fix Warpage — Consolidated Solutions
Category | Problem | Solution | Key Detail |
Material | Wrong material grade for part geometry | Select appropriate grade | Work with supplier; match flowability to wall thickness |
Material | Semi-crystalline high shrinkage | Control mold temperature tightly | Keep ΔT < 5.5°C across mold surface |
Material | Glass fiber extreme anisotropy | Balance gate layout for uniform flow | Multiple gates to reduce flow-length differential |
Product | Uneven wall thickness | Optimize part design | Uniform thickness; avoid abrupt transitions |
Product | Structural asymmetry | Balance geometry | Even rib distribution; symmetric layout |
Mold | Mold temperature uneven | Optimize cooling channels | Distance 15–25mm from cavity; hole diameter >8mm; flow velocity 0.6–1.0m/s |
Mold | Core hotter than cavity | Cool core adequately; raise cavity temp if needed | Part bends toward hotter side |
Mold | Gate too small | Increase gate dimensions | Reduces shear and orientation stress |
Mold | Too few / poorly placed gates | Add gates; follow position guidelines | Reduce flow length; match gate type to part shape |
Mold | Runner too small/long | Enlarge cross-section; shorten length | Reduces flow resistance and mechanical stress |
Mold | Uneven ejection | Balance pin layout; add guide bushings | Prevents additional ejection stress |
Mold | Insufficient draft | Increase draft angle | Reduces ejection force |
Process | Holding pressure too low | Increase holding pressure | Prevents back-flow and density variation |
Process | Holding time too short | Extend to gate freeze time | Ensures uniform density |
Process | Holding pressure too high | Reduce to appropriate level | Avoids over-compression near gate |
Process | Melt temperature too low | Raise barrel/hot runner temp | Ensures uniform melt for low-stress filling |
Process | Mold temperature too low | Raise within supplier range | Adjust ~10°C increments; wait 10 molds to evaluate |
Process | Nozzle temperature too low | Raise in ~5.5°C increments | Until warpage improves |
Process | Unstable cycle | Switch to fully automatic | Eliminate manual intervention |
Process | Low injection pressure/speed | Increase within limits | Improve packing uniformity |
Post-mold | Residual stress locked in | Heat treatment (37.5–43°C water) | Immediate after demolding; gradual cooling |
Post-mold | Persistent shape deviation | Fixture shaping (jig) | No pressure applied; free contraction |
Pro Tip: When adjusting multiple parameters, change one at a time and wait at least 10 consecutive molds before evaluating the result. Warpage is the result of overlapping factors—changing everything simultaneously makes it impossible to identify which adjustment actually helped.
Warpage Troubleshooting Checklist
When warpage appears, systematically check each area before making adjustments:
# | Check Area | What to Check | Target / Standard |
1 | Material | Confirm material grade suits part geometry | Match supplier recommendation |
2 | Material | Verify resin drying adequacy | Follow material drying specs |
3 | Product Design | Measure wall thickness variation | Aim for uniform thickness; avoid abrupt changes |
4 | Mold Temperature | Check temp at multiple cavity points using mold thermometer | Any two points: ΔT < 5.5°C (~10°F) |
5 | Mold Temperature | Check core vs. cavity temperature difference | Minimize ΔT; if core overheats, raise cavity temp as auxiliary |
6 | Cooling System | Verify water flow rate at each circuit | Flow velocity 0.6–1.0 m/s |
7 | Cooling System | Check inlet/outlet temperature difference | ΔT < 2°C for multi-cavity molds |
8 | Cooling System | Check cooling channel placement | Distance 15–25mm from cavity; diameter >8mm |
9 | Cooling System | Total cooling channel length per circuit | <1.2–1.5m (otherwise excessive pressure loss) |
10 | Gate | Inspect gate size and type | Adequate for pressure transfer without excessive shear |
11 | Gate | Verify gate position suits part geometry | Follow guidelines per part shape (see Mold Design section) |
12 | Gate | Check flow-length-to-thickness ratio | Follow material supplier recommendation |
13 | Ejection | Check ejector pin count, distribution, lubrication | Even distribution; guide bushings on large molds |
14 | Draft | Verify draft angle | Sufficient for clean release without excessive force |
15 | Holding Pressure | Check actual cavity pressure (if sensors available) | Adequate to prevent back-flow; not excessive near gate |
16 | Holding Time | Verify gate freeze time | Holding time ≥ gate freeze time |
17 | Melt Temperature | Check barrel and nozzle temperatures | Within material supplier's recommended range |
18 | Mold Temperature | Confirm mold temp setting | Within supplier range; adjust ~10°C increments, wait 10 molds |
19 | Nozzle Temperature | Check nozzle temp and design | Suitable for material; adjust in ~5.5°C increments |
20 | Cycle Time | Monitor cycle consistency | Fully automatic; no manual intervention |
How Mold Flow Analysis Helps Prevent Warpage
Because warpage results from multiple overlapping factors, the most effective strategy is prevention before mold construction, not remediation after the fact.
Mold flow analysis (simulation software) enables:
- Early prediction — Quantify expected shrinkage and warpage magnitude before cutting steel
- Visual diagnosis — See shrinkage distribution, fiber/molecular orientation maps, cooling uniformity, and stress concentration areas
- Fast iteration — Adjust gate positions/quantities, modify wall thickness, optimize cooling channel layout, and tune process parameters virtually
- Root-cause quantification — Determine how much each factor (material, design, process) contributes to total warpage, enabling targeted fixes
Compared to the costly cycle of "build mold → trial → modify → re-trial," upfront mold flow analysis saves significant time and money.
FAQ
Q: Can warpage be fixed without modifying the mold?
A: In some cases, yes—adjusting process parameters (holding pressure, mold temperature, cooling time) can reduce warpage. Post-molding remedies like heat treatment or fixture shaping can also help. However, if warpage originates from mold design issues (gate position, cooling layout, uneven ejection), mold modification is ultimately necessary for a permanent solution.
Q: Is warpage always a material problem?
A: No. While material type (crystalline vs. amorphous, fiber-reinforced vs. unfilled) fundamentally determines shrinkage behavior, warpage is typically the result of multiple interacting factors—material selection, product geometry, mold design, and process settings all contribute. Addressing only one dimension rarely solves the problem completely.
Q: How much warpage is acceptable?
A: Acceptable warpage tolerance depends on the part's function and assembly requirements. For precision components, even 0.1 mm deviation may be unacceptable. For structural parts like crates or panels, 1–2 mm may be within tolerance. Define acceptable warpage limits in the part specification before production begins, and use mold flow analysis to predict whether the design can meet those limits.
Need Help with Your Injection Molding Project?
Warpage and other molding defects can be costly—in rejects, delays, and customer complaints. At JCV Precision Manufacturing, we bring 26 years of injection molding and mold-making experience to every project, with strict defect control from design through production.
Contact us today for a free consultation or quote on your next injection molding project.
Related Injection Molding Defects
Warpage often co-occurs with or shares root causes with other common defects:
Sink Marks — Both stem from non-uniform shrinkage; thick sections shrink inward, creating surface depressions. Read: What Causes Sink Marks in Injection Molding and How to Fix Them
This article is part of our Injection Molding Defects Series. Explore all 15 common defects and learn how to identify, fix, and prevent them.
